If you’re thinking of building a membership site in WordPress, you’ll need a solid theme, like the Divi plugin, and a membership plugin that pairs well with it, like Paid Member Subscriptions. The Divi plugin is one of the best WordPress page builders on the internet. Done right, you can use your Divi membership site to:
- Create membership tiers
- Sell products, online courses, or training programs
- Create registration pages and registration forms
- Set up automatic email notifications
In this complete guide, we’ll show you how to create a Divi membership site using the popular Divi theme in combination with the Paid Member Subscriptions plugin.
The key benefit of using the Paid Member Subscriptions plugin is that it lets you set up a complete membership site in a few simple steps. Unlike other membership plugins, you won’t run into theme (or plugin) conflicts or pay extra for features you likely won’t use.
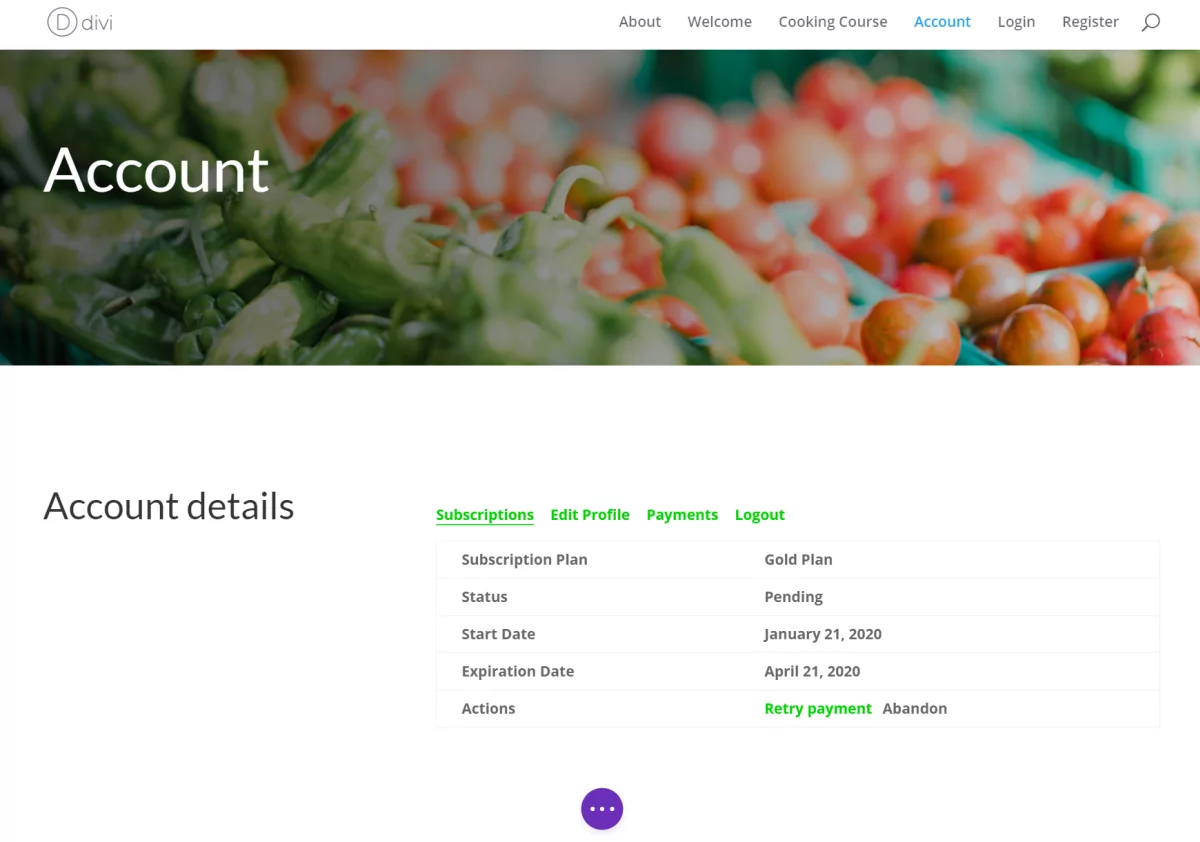
As a website developer, you’ll benefit from a clean back-end, while your end-users will enjoy a smooth membership experience. By the time you’re done, your Divi membership site will look something like this:
Creating a Divi Membership Site
Creating a visually-appealing WordPress membership site isn’t easy.
Oura Ring 5 Sizing Kit - Size Before You Buy Oura Ring 5 - Unique Sizing, Not Standard Ring Sizing - Receive Amazon Credit for Oura Ring 5 Purchase
$10.00 (as of June 24, 2026 13:57 GMT +00:00 - More infoProduct prices and availability are accurate as of the date/time indicated and are subject to change. Any price and availability information displayed on [relevant Amazon Site(s), as applicable] at the time of purchase will apply to the purchase of this product.)Although there are many feature-rich membership plugins out there, not all of them integrate with WordPress themes seamlessly. Not to mention, some of the “best membership plugins”, like MemberPress or Paid Membership Pro, are known to cause plugin conflicts – often with security, anti-spam, and redirection plugins.
For this reason, we recommend using the Divi theme with the Paid Member Subscriptions plugin to build your Divi membership site. It’s a good idea to use a Divi child theme whenever you’re editing your WordPress site’s design.
More specifically, we’ll start by creating the foundation of our membership site using the Paid Member Subscriptions plugin. Once that’s done, we’ll move on to designing the membership website’s pages using Divi (and the powerful page builder i.e. Divi Builder with a Divi child theme). It’s also worth mentioning that Divi supports e-commerce features via WooCommerce.
Here are the different areas we’ll cover in this tutorial:
- Create membership site pages
- Content restriction i.e. protected content
- Account options
- Custom registration redirect URLs
- Registration form and account form field labels
- Payment options
- Creating membership tiers
- Membership registration
- Adding members-only content
Why You Should Offer Different Membership Tiers
There are many different ways to set up memberships. You can set up a free membership (with a single membership tier) or create multiple membership tiers. Membership tiers are also called membership levels.
For example, if you choose to offer a single free membership, you would offer members access to exclusive content in exchange for their email address. In other words, when a member registers for the membership plan, they’ll gain access to your products or online course.
On the flip side, if you create multiple membership tiers, you can offer a combination of free and paid membership tiers. For example, you might offer:
- A free Tier 1 membership plan that gives members access to basic products or introductory course material. It’s designed to generate interest and encourage members to upgrade to a higher membership plan;
- A Tier 2 membership plan that gives members access to all of the essentials. If you’re selling an online course, members have access to all of the course content;
- A high-end Tier 3 membership plan that offers everything included in the Tier 2 plan in addition to high-value exclusives like downloadable resources (like PDFs), 30-minute one-on-one consultancy, or access to private forums.
The key benefit of offering different membership tiers is that you can create something for everyone. People who are on the fence can opt for the Tier 1 plan and upgrade whenever they’d like. And people who want to sign up for the membership but don’t want to pay extra for additional resources can simply opt for the Tier 2 plan. Since Divi works seamlessly with e-commerce plugins like WooCommerce, it’s easy to sell memberships.
Of course, there are many ways to differentiate between your membership tiers. This all depends on the sort of product or online course you want to offer members.
Benefits of Using an Elegant Themes Membership Plugin Solution
The key benefit of using an Elegant Themes membership plugin solution i.e. the Divi page builder with Paid Member Subscriptions is that you have full control over your membership site’s design and functionality.
This means that you can tweak the design however you’d like and sell as many membership subscriptions as you’d like. In addition to this, you can rest assured that your membership site will be optimized for performance and rank well in Google SERPs.
You can also choose from a variety of widgets to add to your site’s pages and set up social media integrations. This is a great way to encourage prospective members to find your membership plans from social media platforms.
How to Create a Divi Membership Site Using Paid Member Subscriptions
The key to building a Divi membership site is to start with the membership features and worry about the design bits later. In this section, we’ll show you how to create membership tiers, set up essential pages, and configure payment details.
For this tutorial, you will need:
- A WordPress website;
- Divi WordPress theme by Elegant Themes and a child theme;
- Paid Member Subscriptions plugin by Cozmoslabs;
- Some products (e.g. WooCommerce products) or an online course to offer members on your landing page.
Keep in mind that your Divi membership site might vary slightly depending on the sort of membership you’re looking to offer. But to illustrate the process, we’ll build a Divi website (that provides access to an online course) with three membership tiers.
Create Membership Site Pages
The first thing you need to do is create the different pages you’ll need in order to let people register for a membership. This includes:
- Registration page. Create a simple registration page that people can use to register for membership. Ideally, members should be able to select the membership plan from the registration page so you don’t have to create multiple registration pages.
- Account page. This is the account page members can use to edit their account information and manage their subscriptions. This is especially important for membership sites.
- Login page. This is the page members will use to log in to the membership site and access the content.
The great thing about Paid Member Subscriptions is that it automatically creates all three pages for you using shortcodes. If you’d like more control, you can edit the pages by opening them on the Edit Page screen.
Once you have the WordPress membership plugin installed and activated on your website, you’ll notice the following pages have been created and published for you:
- Register – The WordPress plugin adds a registration form to the page that people can use to register for their membership tier of choice.
- Account – This is the member account page that lets members edit their account information and manage subscriptions. You might want to rename the account page to something like My Membership Account or My Account.
- Login – This is a simple login page that allows members to log in to the membership site and access content.
Content Restrictions
If someone accidentally lands on a page or post they’re not authorized to see, the Paid Member Subscriptions plugin will display a restriction message. You can customize this restriction message by heading over to Settings from the Paid Member Subscriptions menu item and clicking on the Content Restriction tab.

Set the Type of Restriction option to Message. Next, scroll down till you reach the Restriction Messages section. From here, you can customize the message for both logged-out users and logged-in non-member users using a WYSIWYG editor.
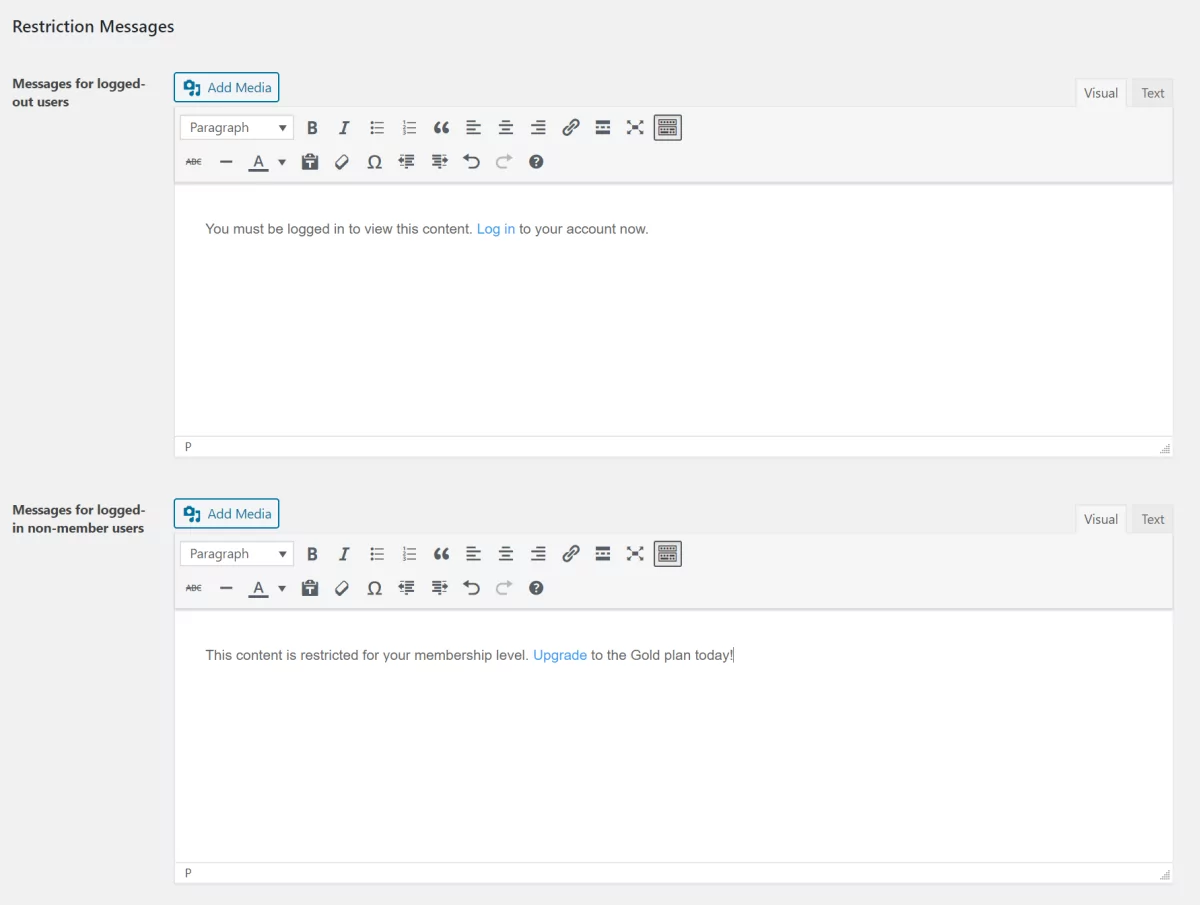
You can use this as an opportunity to encourage unauthorized users to log in to their accounts or upgrade their membership. All you have to do is include a link to the Login page or the Account page.
From the same screen, you can also decide what happens to comments and whether or not you want to show unauthorized users a post preview.
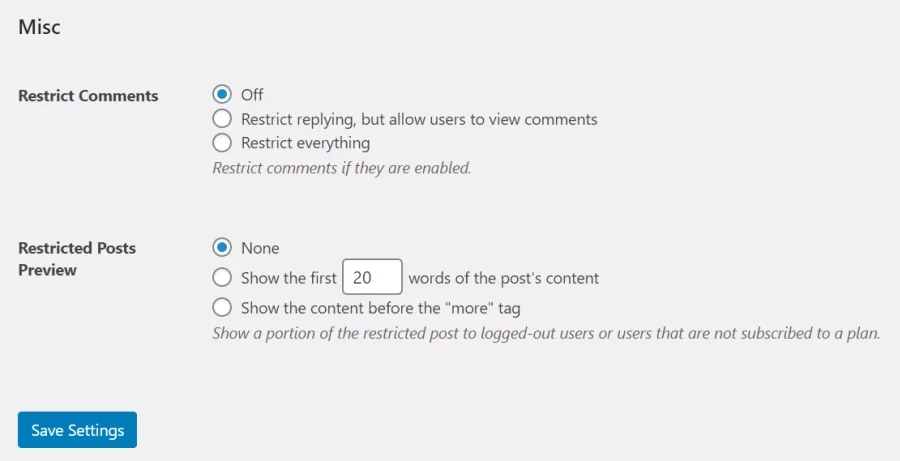
Click the Save Settings button to proceed.
Account Options
The Paid Member Subscriptions plugin lets you prevent account sharing. What this means is that you can prevent members from being logged in with the same account from multiple places at the same time.
The key benefit of this option is that it prevents members from sharing their membership account with friends and family. To enable this option, head over to Settings from the Paid Member Subscriptions menu item and click on the General tab.
Next, tick the checkbox next to the Prevent Account Sharing option:
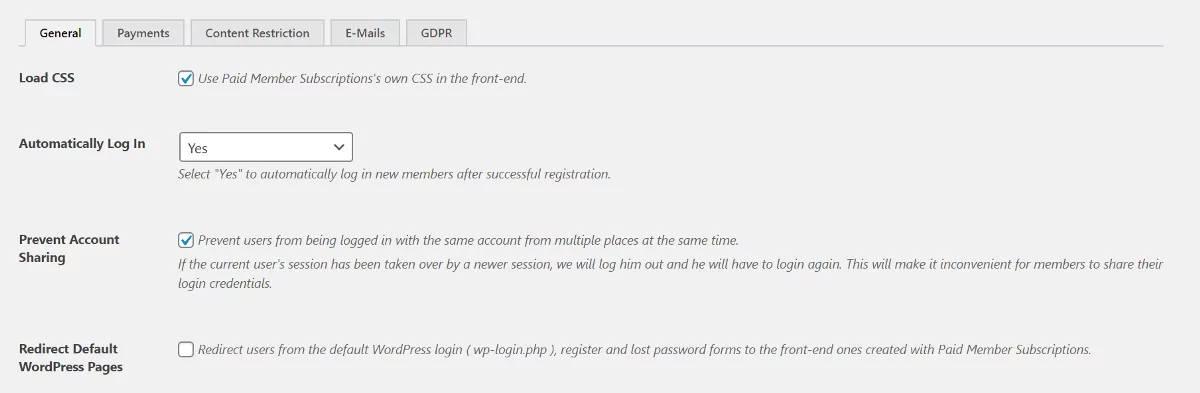
From the same screen, you can also choose to Automatically Log In new members if their registration is successful. We recommend setting this to Yes to deliver a good user experience.
Click the Save Settings button at the bottom of the screen to proceed.
Custom Registration Redirect URLs
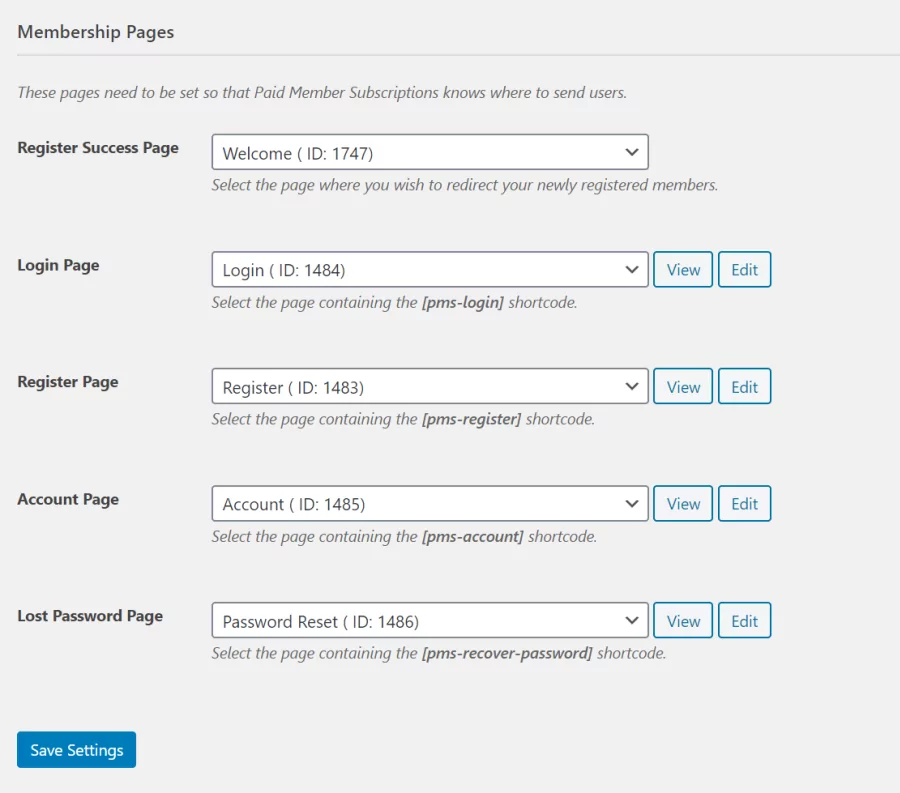
Paid Member Subscriptions lets you send users to a page of your choice upon successful registration. This is useful if you have a homepage or Welcome page set up or a page where new members can learn about the membership site.
Assuming you already have a Welcome page (or something similar) set up, go to Settings from the Paid Member Subscriptions menu item and click on the General tab. Scroll down till you reach the Membership Pages section. From here, use the Register Success Page dropdown to select the Welcome page.
Registration Form and Account Form Field Labels
Depending on the type of membership site you’re looking to create, you might need to change the default form field labels to improve user experience and make the forms user-friendly. The Paid Member Subscriptions plugin lets you install the Labels Edit add-on to modify any form field label on your membership site.
For example, the default registration form has an input field for the member’s email. You can use the Labels Edit add-on to change it from Email to Email Address.
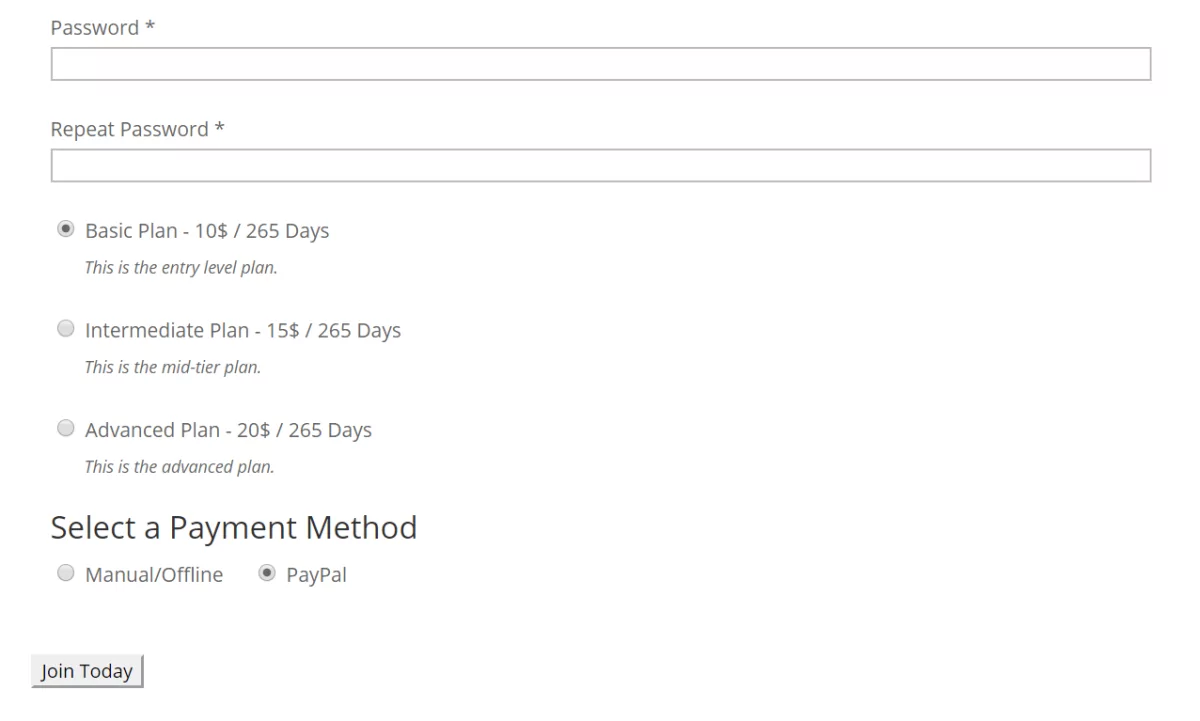
In addition to this, the Labels Edit add-on also lets you modify any strings that appear in your registration form or account form. For example, you could change the Register button to something more actionable like Join Today or Sign Up.
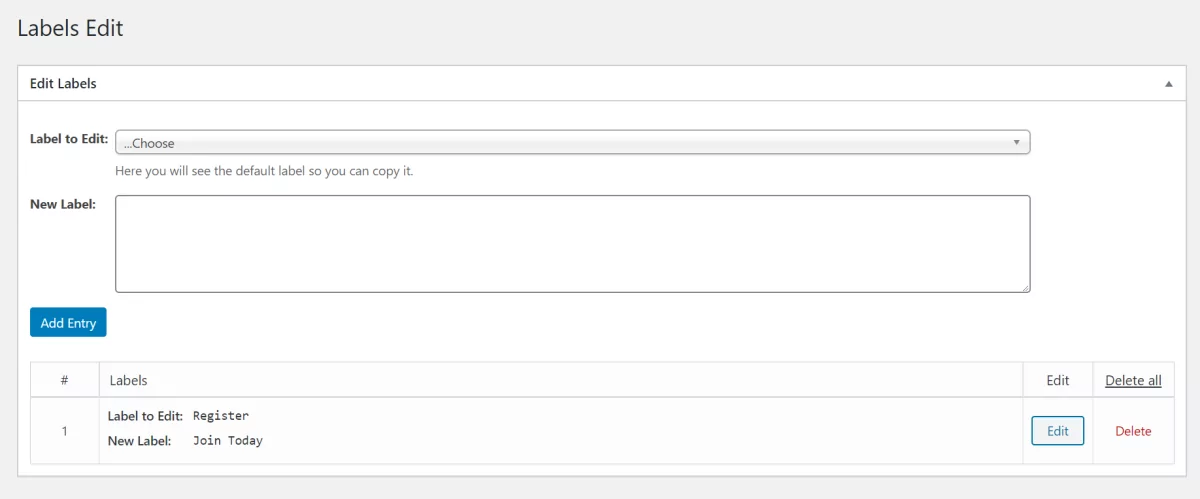
Once you have the add-on installed and activated on your website, go to Labels Edit from the Paid Member Subscriptions menu item. Choose the label you’d like to edit using the Label to Edit dropdown. Enter the new label in the text box and click the Add Entry button to continue.
Payment Options
To configure payment options, simply navigate to Settings from the Paid Member Subscriptions menu item and click on the Payments tab. This is where you’ll find settings to configure your payment gateway to sell your memberships.
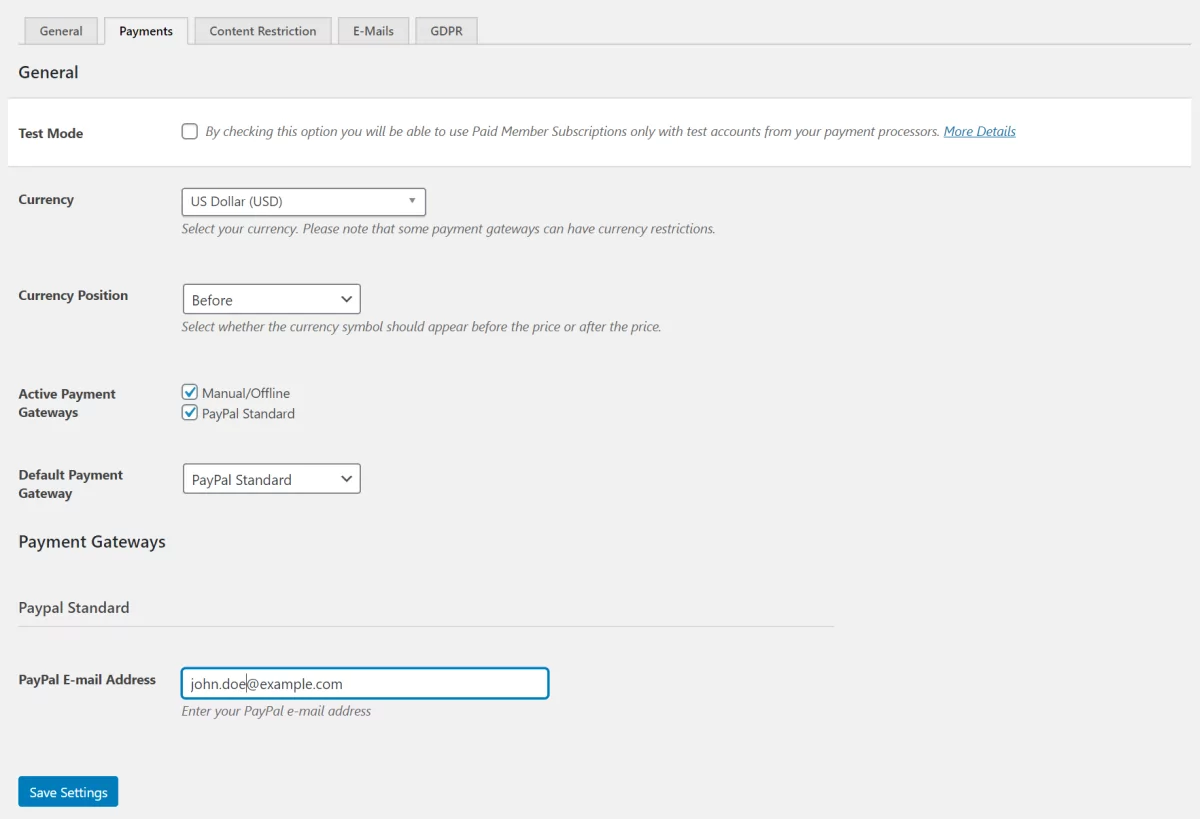
Paid Member Subscriptions lets you choose:
- Currency
- Currency position
- Active payment gateways
- Default payment gateway
Out of the box, Paid Member Subscriptions lets you offer both Manual/Offline and PayPal Standard payment options. However, you can install add-ons if you’d like to offer additional payment gateways like Stripe, PayPal Express, or Recurring Payments for PayPal Standard. You can also create coupon codes later on to increase subscriptions.
Creating Membership Tiers
Now that we have a solid foundation in place for our membership site, it’s time to create membership tiers. Note that when creating membership levels you should never overlook the tier names you choose for each since this can make or break your subscription rate.

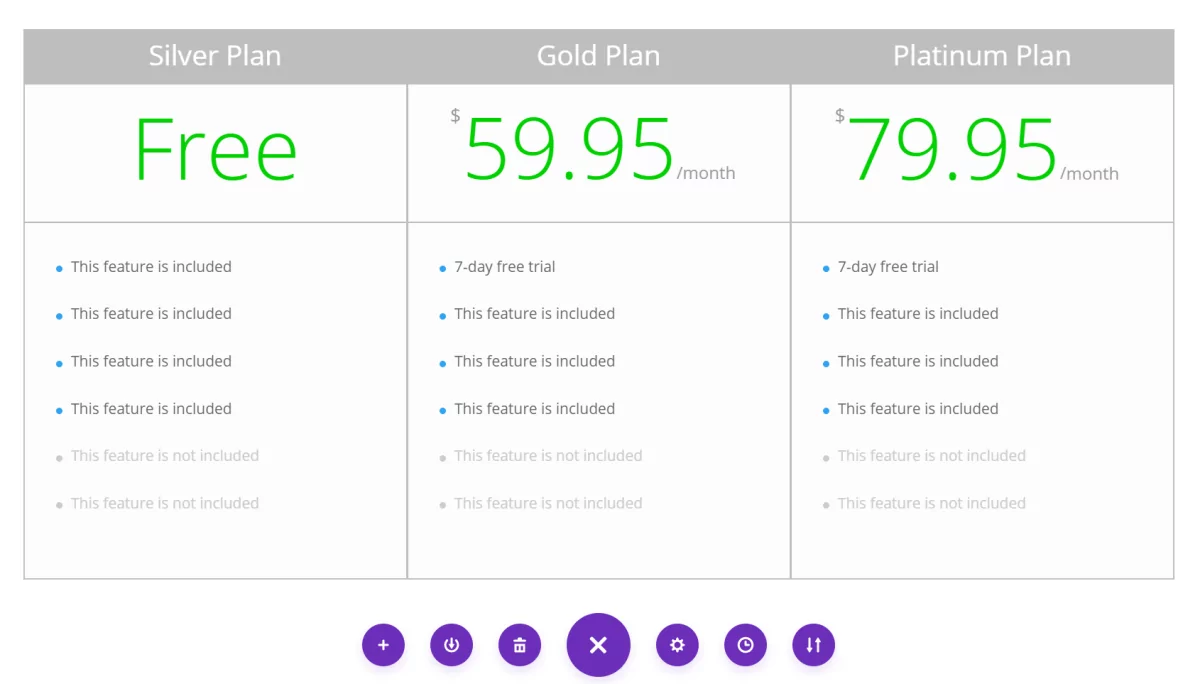
Following our example from above, we’ll create three membership tiers:
- Silver. This will be the free membership plan that gives members access to introductory course material.
- Gold. This will be the Tier 2 membership plan that gives members access to the entire online course.
- Platinum. This will be the high-end, Tier 3 membership plan which offers the entire online course as well as downloadable resources and a 30-minute one-on-one consultancy.
To create the first membership tier, head over to Subscription Plans from the Paid Member Subscriptions menu item and click the Add New button.
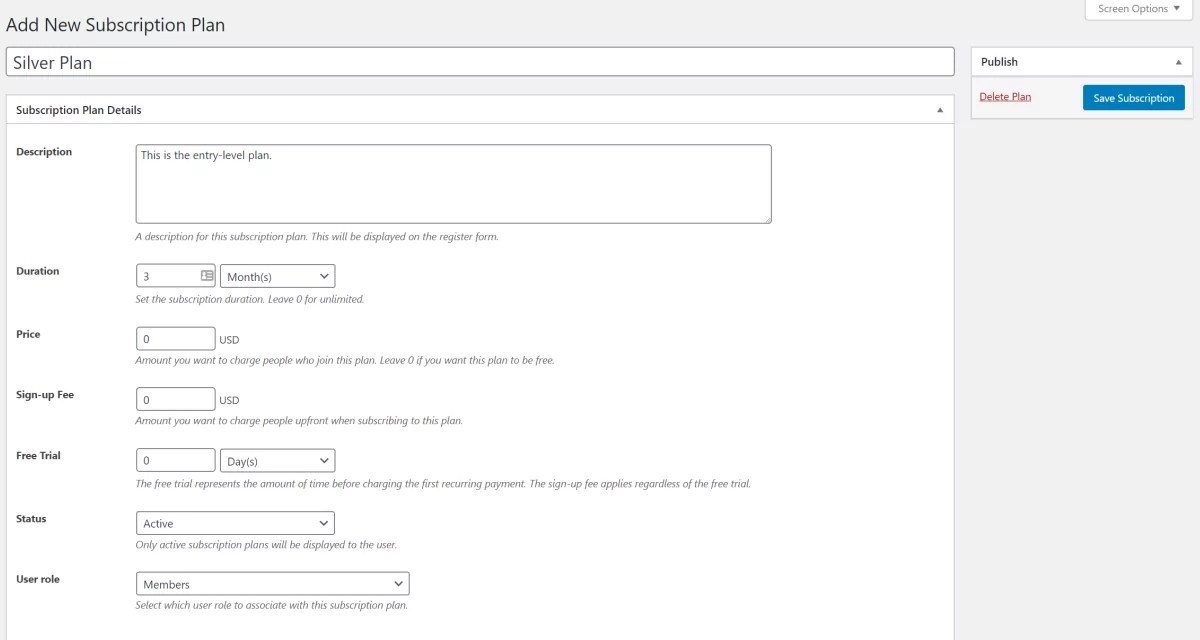
Give the subscription plan a title. In our case, we’ll call it the Silver Plan and fill out the subscription plan details. This will depend on the sort of subscription you’re looking to offer. For example, we want to offer a three-month subscription for our online course.
Click the Save Subscription button to continue. You’ll notice three additional options added to the top of the screen – Add Upgrade, Add Downgrade, and Add New.
Click the Add Upgrade button to add the next membership tier i.e. the Gold Plan.
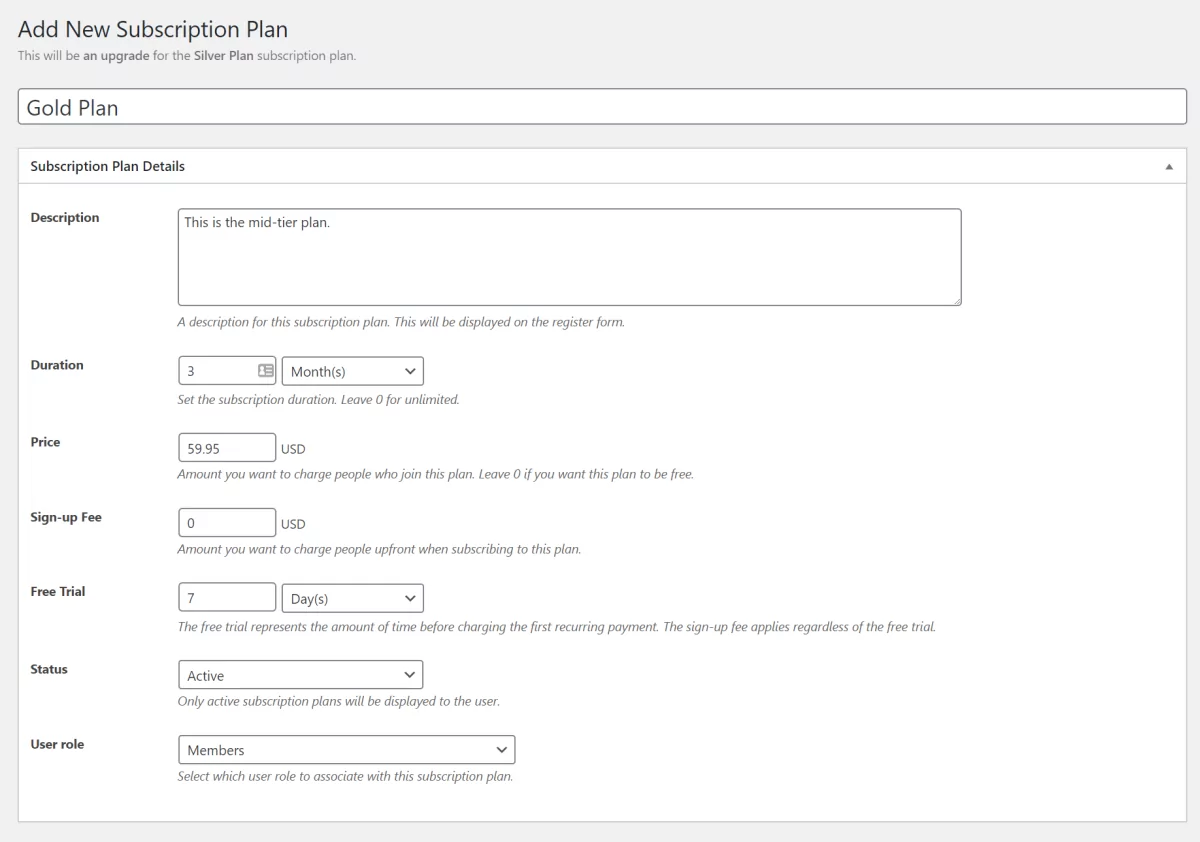
Same as before, fill out the subscription plan details. We want to charge members a $59.95 monthly fee for access to the online course. Paid Member Subscriptions also gives you the option to offer a limited-time free trial.
Click the Save Subscription button. Repeat the same steps to add the final membership tier i.e. the Platinum Plan.
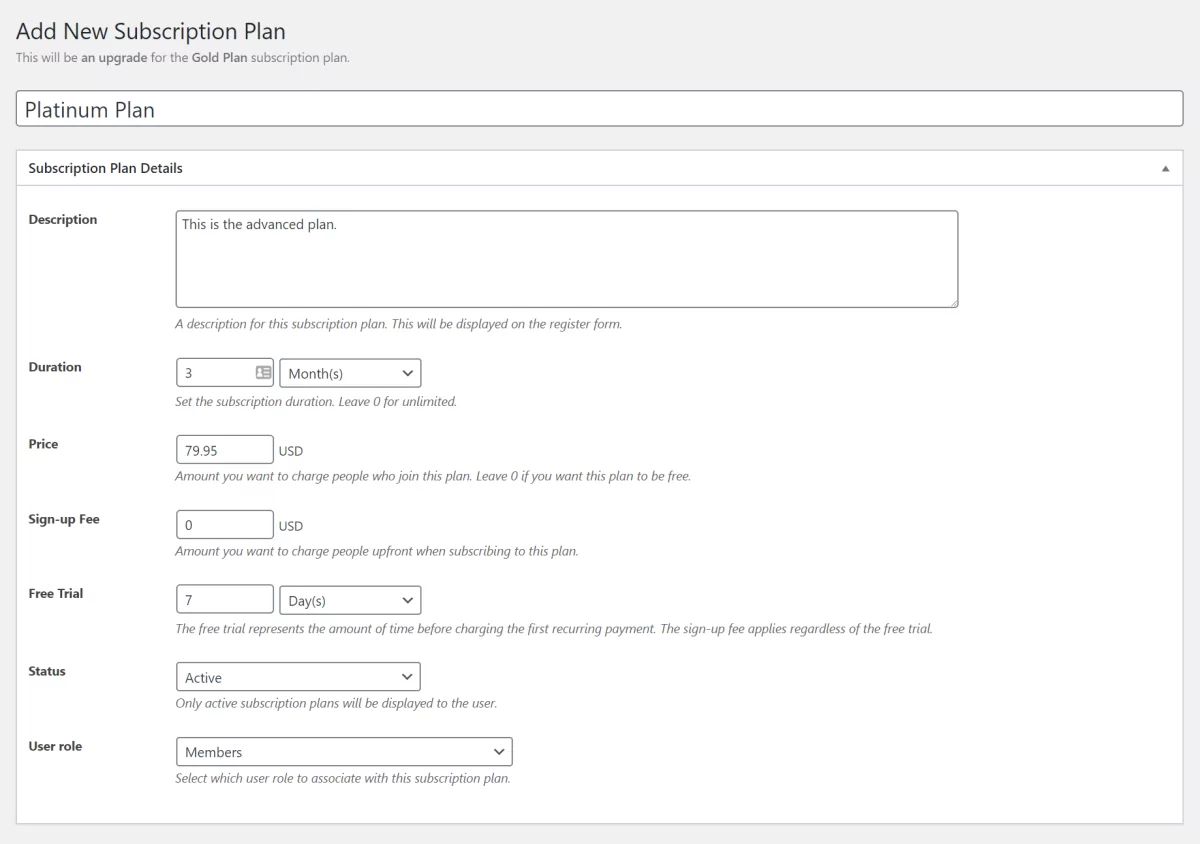
Creating Standalone Membership Tiers
Notice how it says “This will be an upgrade for the Gold Plan subscription plan” at the top of the screen? This is because we’ve added the Platinum Plan as an upgrade. If you want to create a standalone membership tier, simply click Add New instead of Add Upgrade. This way, you can offer multiple membership tiers without giving members the option to upgrade from one tier to the next.
Membership Registration
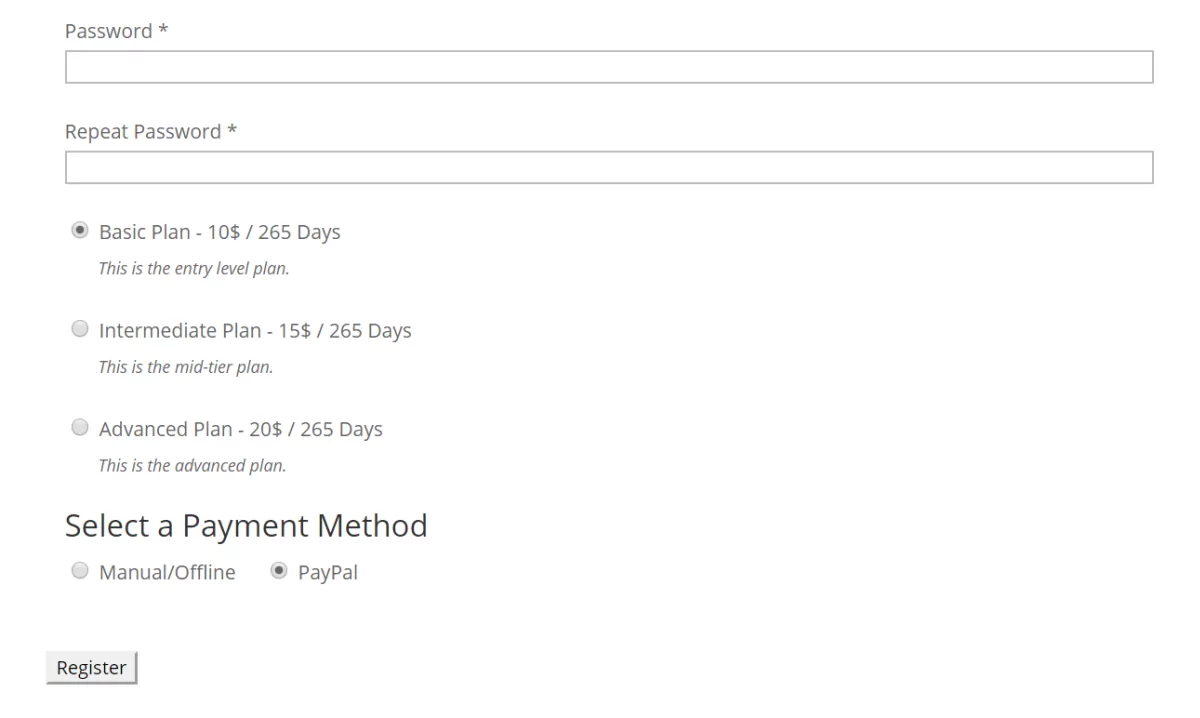
Now, whenever a prospective member accesses the membership registration page, they’ll see all three membership plans listed in the form.
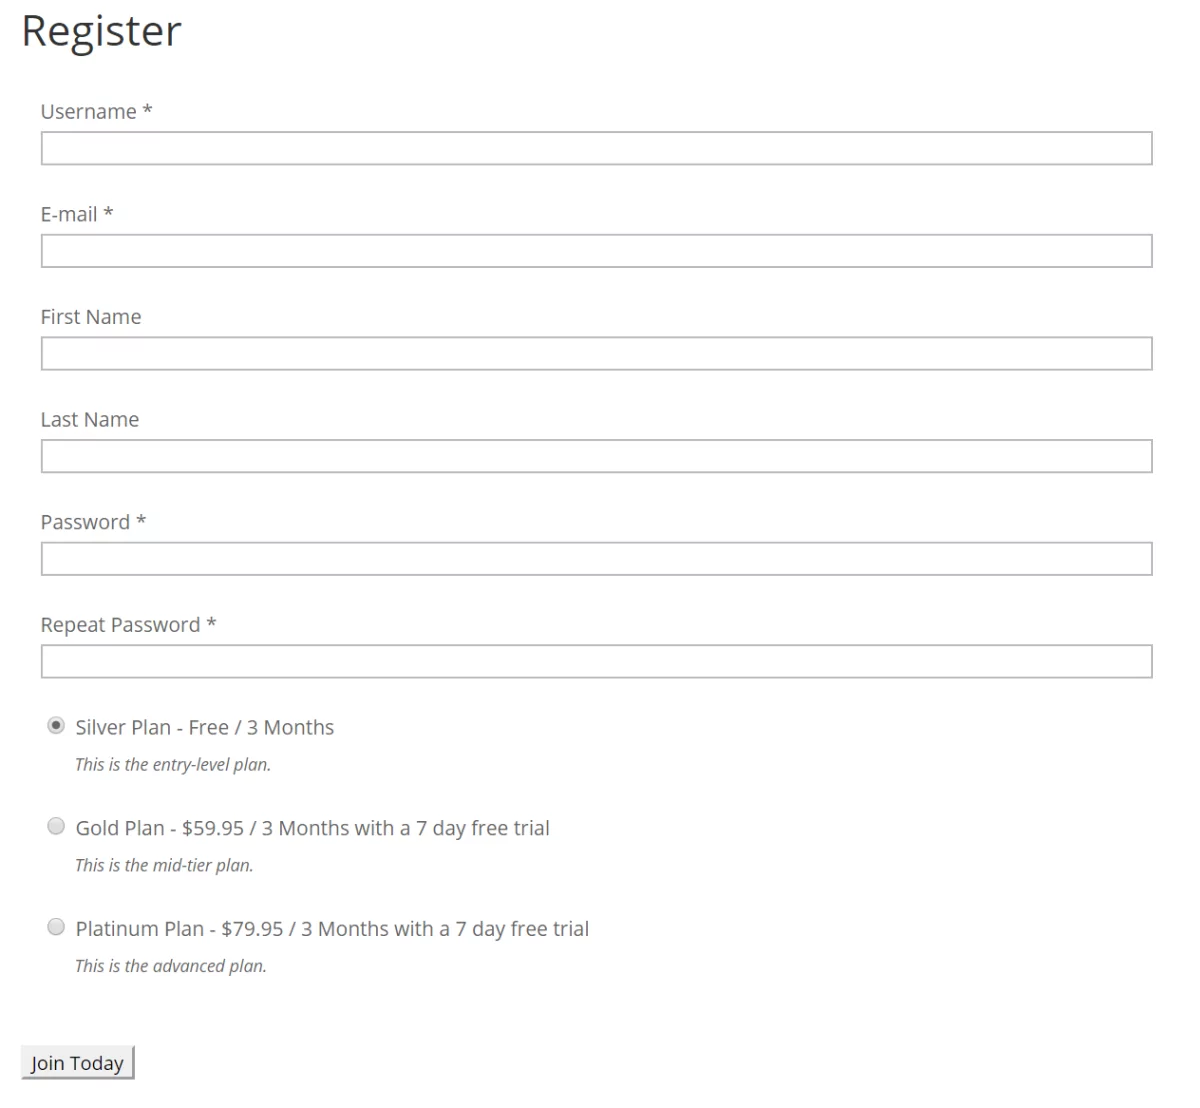
The registration form automatically displays the subscription plan details. For example, the Gold Plan is available for $59.95 per month for three months and there’s a 7-day free trial. This way, prospective customers know exactly what they’re signing up for.
Adding Members-Only Content
With Paid Member Subscriptions, there are two ways to make content available for members only. You can do this without damaging your membership site’s SEO in search engines like Google.
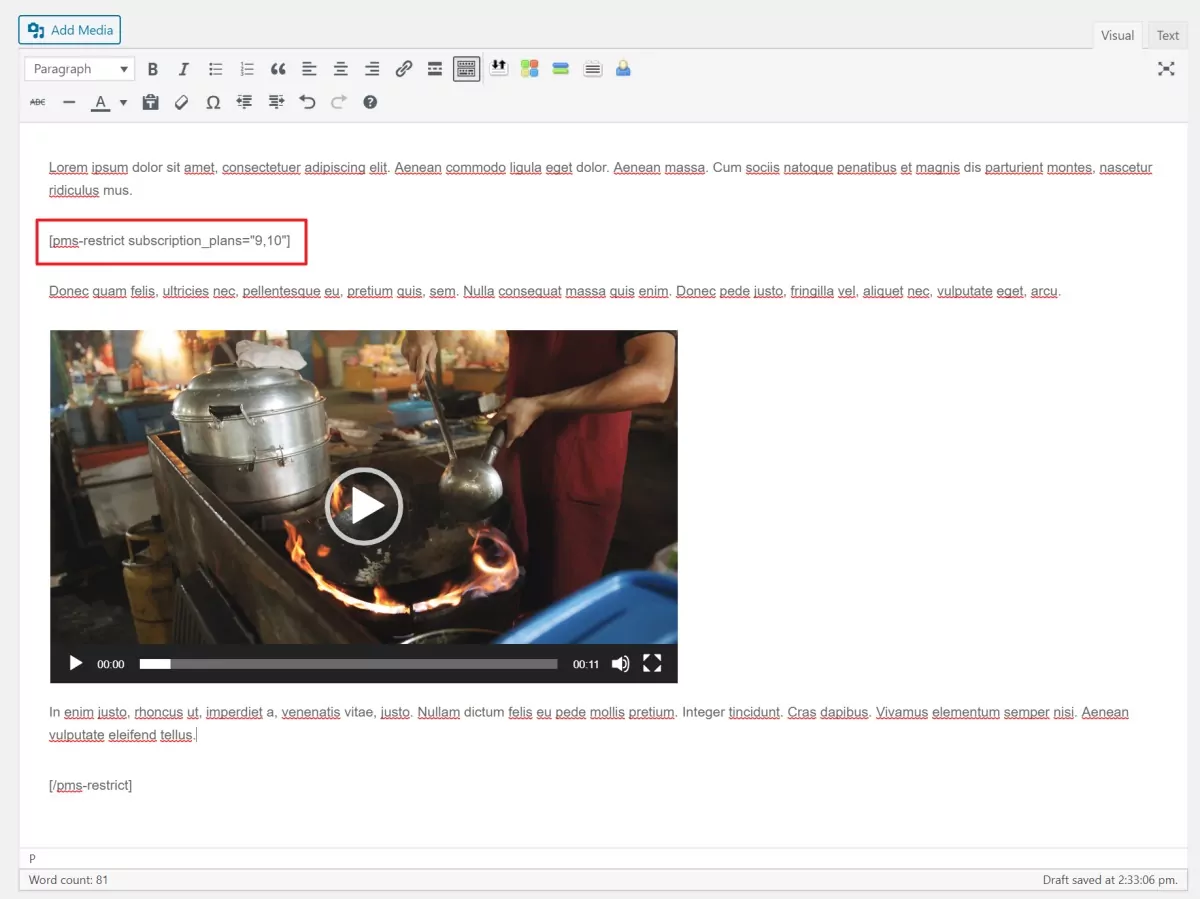
If you want to restrict access to a portion of the content on your post or page, you can use the [pms-restrict subscription_plans=”9,10″]Your content here.[/pms-restrict] shortcode. In this case, 9 and 10 are the subscription plan IDs that will have access to the restricted content.
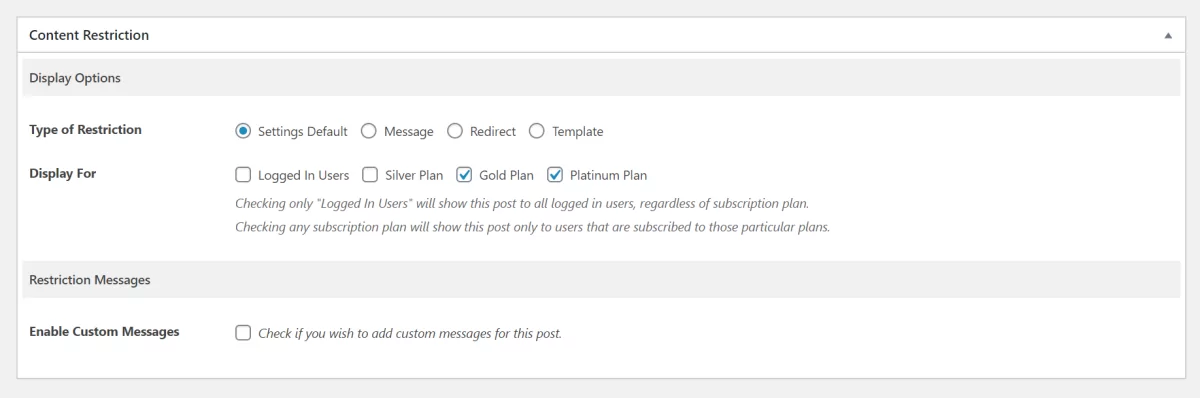
Alternatively, you can head over to the post or page you’d like to restrict access to and choose which subscription plans to provide access to. Scroll down to the Content Restriction section and choose which plans to provide access to using the Display For option.
Additional Features to Add to Your Divi Membership Site
By now, you should have a fully functional Divi membership site. To deliver a good user experience, you might consider customizing the email settings available with Paid Member Subscriptions.
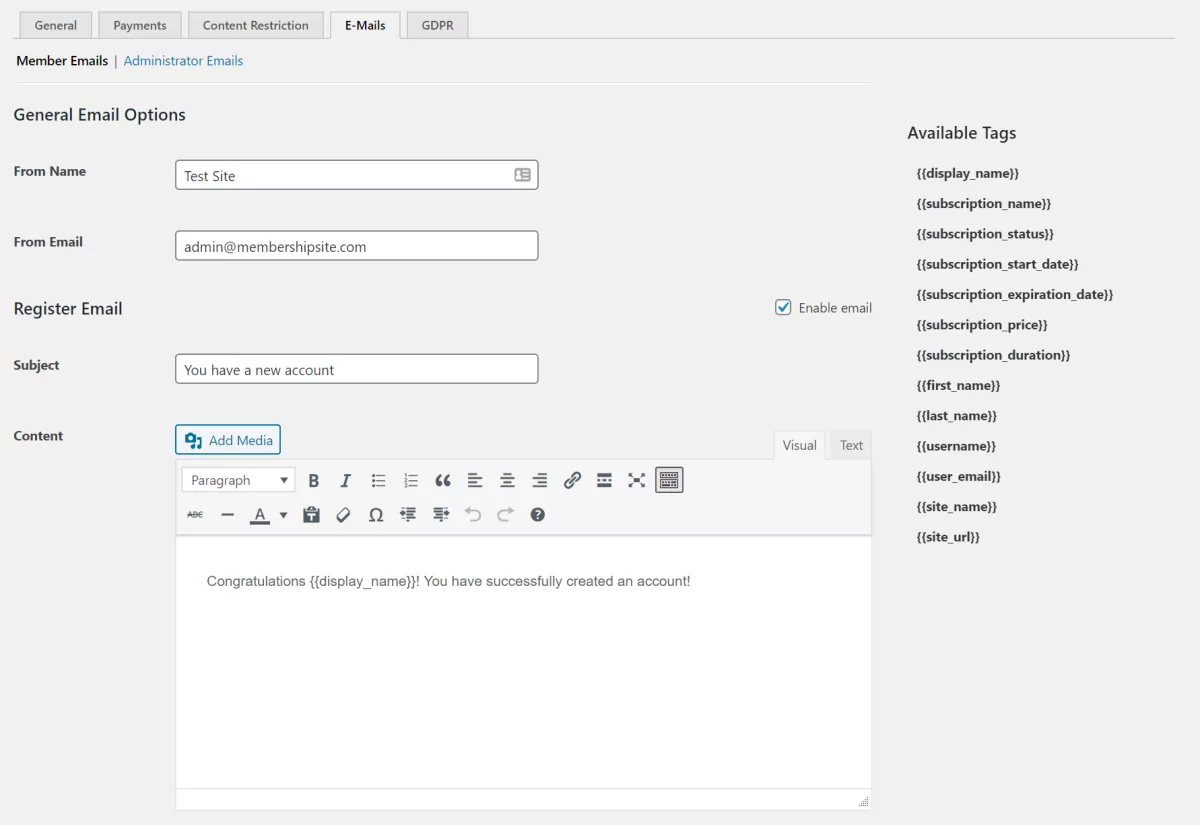
Go to Settings from the Paid Member Subscriptions menu item and click on the Emails tab. From here, set the From Name and From Email for your emails. You can also customize the subject lines and content for different types of emails. These include:
- Register email
- Activate subscription email
- Cancel and abandon email
- Expired subscription email
Paid Member Subscriptions lets you customize both member emails and administrator emails.
Customizing the Theme of Your Divi Membership Site
In this section, we’ll show you how you can design your Divi membership site using the powerful Divi Builder. To demonstrate, we’ll be using a pre-made Divi layout. We recommend creating a child theme with Divi.
Let’s start with the Divi Theme Customizer. To access this, head over to Theme Customizer from the Divi menu item in the WordPress admin panel. Best practices suggest that you should always use a child theme.
Theme Accent Color
Start off by changing the Divi theme accent color. It will affect several different elements throughout your Divi membership site, such as headings and links. This should be your main brand color.
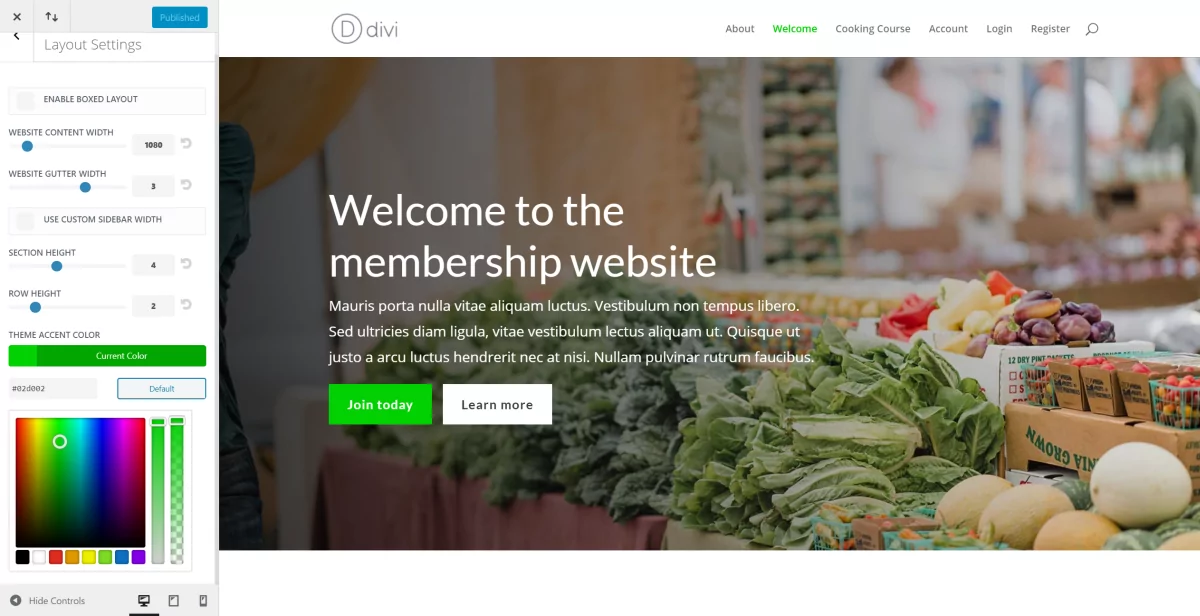
To do this, navigate to Layout Settings from General Settings. Use the Theme Accent Color option to modify the accent color.
Typography
You can change your entire Divi membership site’s typography settings from the Theme Customizer. Simply head over to Typography from General Settings. Use the available options to modify your site’s font, text size, text spacing, and much more.
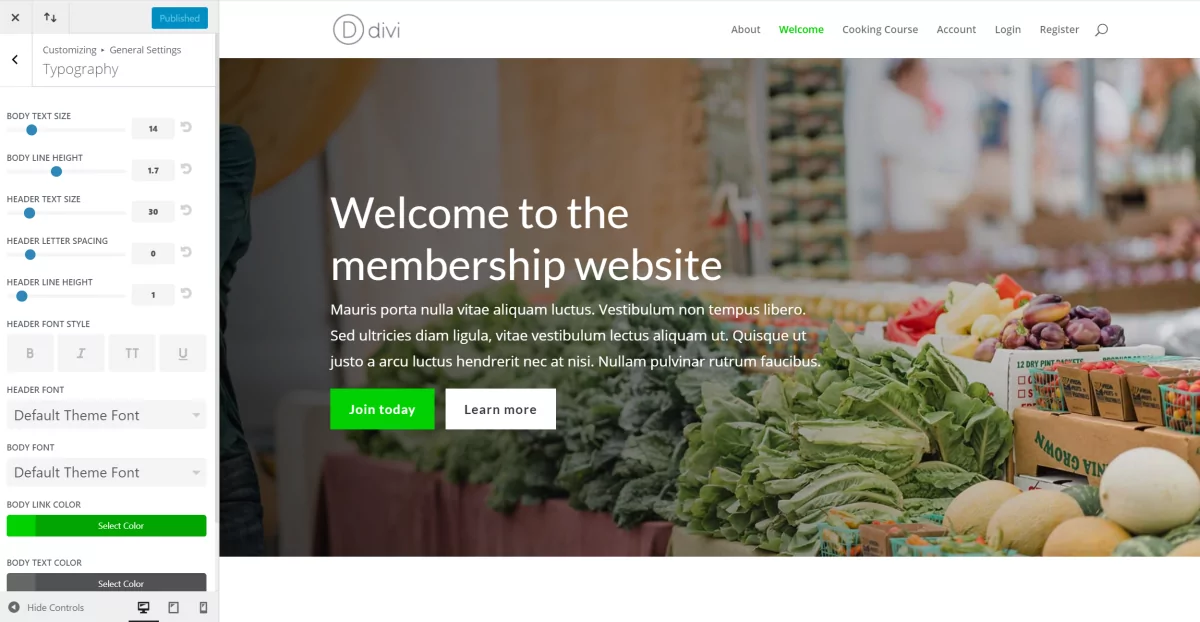
You can also change the font color from here. Notice how the theme accent color shows up in the Body Link Color setting.
Layout for Membership Pages
Using the Divi Builder with a child theme, you can create a generic page layout for your membership site pages. The key benefit is that your pages will look consistent throughout the Divi membership website. And the best part is that you don’t have to hire a web designer to do it for you.
Here’s what you need to do:
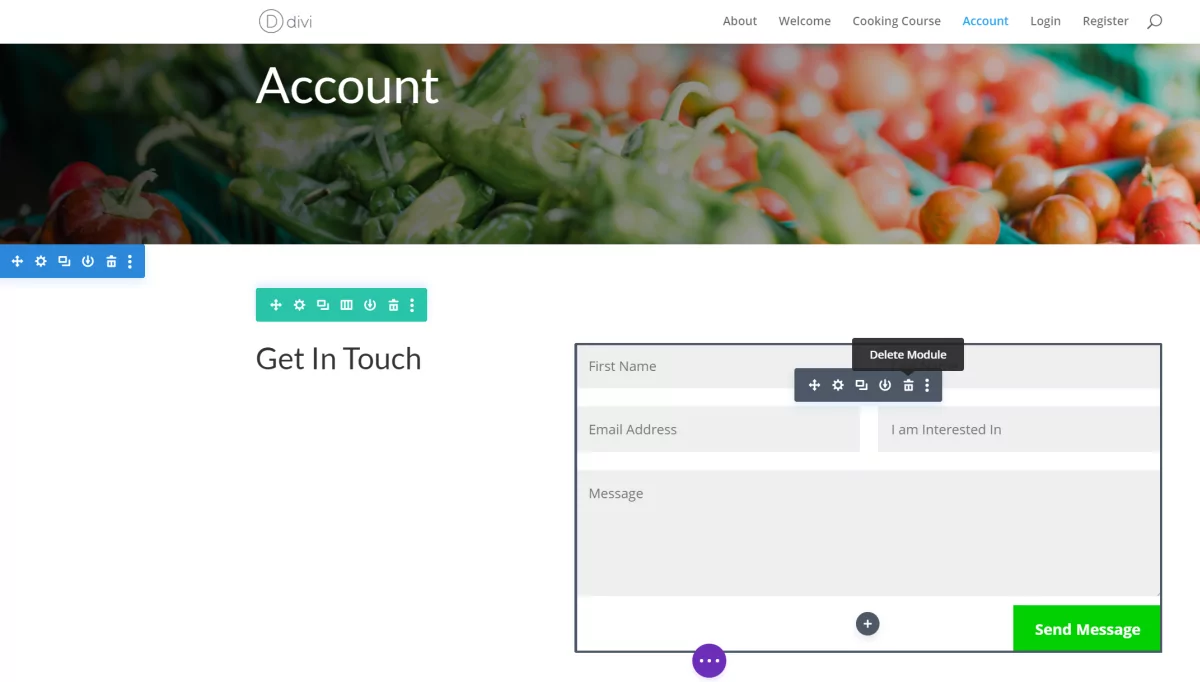
Open up the page you want to edit and click the Use The Divi Builder button to get started. To demonstrate, we’ll edit the Account page.

Find a page in the layout pack you’re using that would best fit the page you’re editing in terms of design. We’ll go with the Contact page. Click the Use This Layout button to proceed. For the sake of simplicity, we’ll continue editing our child theme on the front-end.
First, change the title of the page to Account. Once that’s done, replace the contact form module with a Text module.
Enter the shortcode [pms-account] in the text editor.
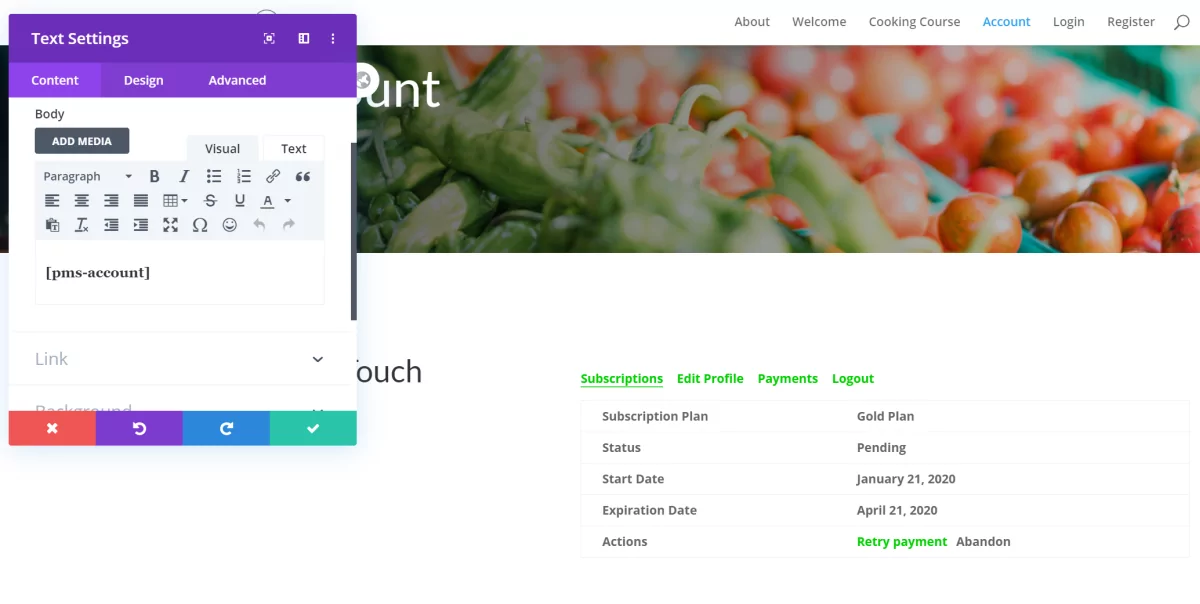
Finally, change the Get In Touch text to something like Account details.
Once you’re done, your account page should look something like this:
Click the Save button to continue.
You can use the Divi Builder’s options to save this template to your library. This way, you’ll have a generic template that you can easily import into other membership pages and modify as necessary. For example, you could import it into your login page and use the [pms-login] shortcode to create a login page.
To take things further, you can create pop-ups for presenting exclusive offers and opt-ins.
Pricing Page
Using the Divi Builder, you can also create new pages for your Divi membership site. For example, you might consider creating a pricing table to make it easy for prospective customers to view your membership tiers and decide which plan to opt-in for.
To do this, start by importing the generic template you created. Next, change the default column structure to a single-column layout. Insert a pricing table module into the column.
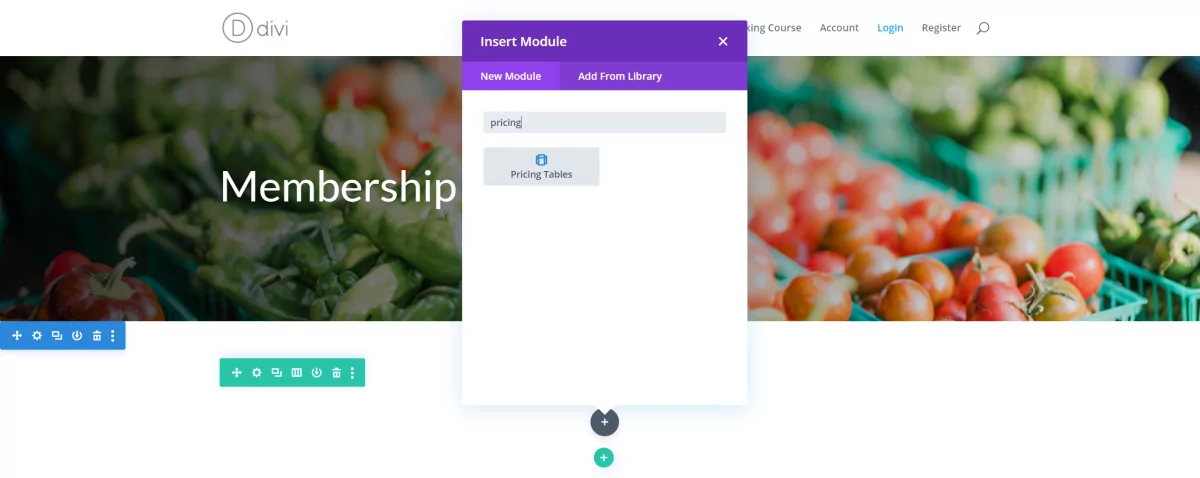
Finally, update the pricing table information by replacing the demo content with your own.
In this way, you can create as many different types of pages as you’d like for your Divi membership site. You can also add custom CSS to your pages though you don’t necessarily have to mess around with any HTML or CSS code. This way, you’re able to create a high-quality, professional-looking membership site.
You also want to make it easy for prospective members to subscribe to a membership plan and proceed to checkout. For this, you will need to create a Subscribe or Register button that contains a link to let the user pre-select a certain membership plan. With Paid Member Subscriptions, you can easily pre-select a subscription plan through a URL parameter.
Let’s say that the URL of the Register page we created above is https://yoursite.com/register. So, in order to let the user pre-select the Gold Plan, we would add the link https://yoursite.com/register?subscription_plan=1751 to the Subscribe button. In this example, 1751 is the ID of the Gold Plan. You can find the ID of subscription plans under the Subscription Plans list in the Paid Member Subscriptions admin menu.
To take things further, Paid Member Subscriptions also lets you make the selected subscription plan the only one that appears on the Register form. In other words, the other subscription plans will be excluded from the Register form if the user clicks the Subscribe button under the Gold Plan. To do this, simply use the URL https://yoursite.com/register?subscription_plan=1751&single_plan=yes. When a user clicks on the Subscribe button now, they’ll be redirected to the Register page that has the Gold Plan pre-selected and it will be the only one listed. The user would now only have to enter their account details and pay for the subscription.
Create Your Own Divi Membership Site Today!
Creating a membership site can be pretty easy (and fun!) if you have the right tools in your arsenal. With the popular Divi theme by Elegant Themes and Paid Member Subscriptions plugin by Cozmoslabs, you can build your own Divi membership site, customize it however you’d like, and offer a variety of membership options. It’s also great for creating a learning management system (LMS) website since it’s a multipurpose solution.
Divi and Paid Member Subscriptions pair extremely well with one another which makes the entire site-building process easy and hassle-free. Not to mention, there’s practically no limit to the design options available to you thanks to the powerful drag and drop page builder, Divi Builder. You’ll be able to take your membership site to the next level using Divi with Paid Member Subscriptions.
Paid Member Subscriptions Pro
Accept (recurring) payments, create subscription plans and restrict content on your website. Easily setup a WordPress membership site using Paid Member Subscriptions.
Do you have any questions about how to use Paid Member Subscriptions to build your Divi membership website? Let us know in the comments section below.
Source: https://www.cozmoslabs.com/189671-divi-membership-site/